Buying an ASIC Miner
I decided that, after two months of mining with repurposed PCs, it was time to try buying a dedicated ASIC miner for Bitcoin. But just what is an ASIC miner, and why did I want one?
Well, I suppose we should start with just with a simple description of just what an ASIC is. ASIC stands for “application-specific integrated circuit,” and it’s basically a device designed for one function. In my case, this ASIC was used specifically for Bitcoin mining. ASICs are limited to one particular application, and in the case of cryptocurrency mining, one specific protocol.
If you haven’t seen my previous episode in this series, please go check it out here.
Why ASIC Over GPU?
In the world of Bitcoin mining, miners have many options on how they want to mine. A miner can use their CPU, an array of GPUs, or they can opt for an ASIC. Every option has pros and cons, but typically Bitcoin miners opt for ASICs due to their efficiency and hashing power. Some cryptocurrencies, such as Ethereum and Monero, cannot use ASIC devices due to the simple fact that ASICs don’t exist for their protocols. The difference between ASIC, CPU, and GPU mining is broad enough of a topic to deserve its own write-up, so today we’re simply going to focus on my experiences with buying and deploying my first ASIC device.
Where to Buy?
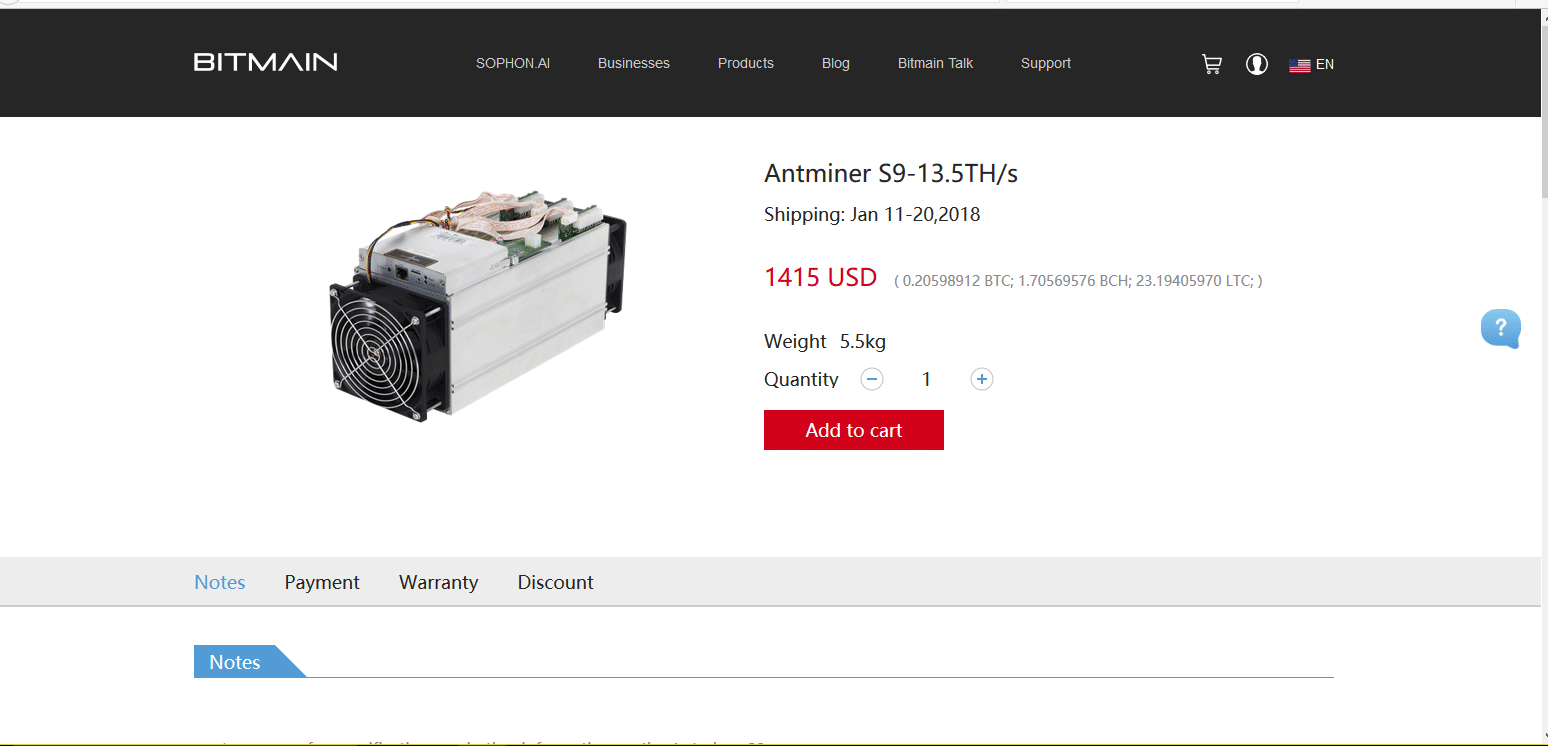
After several days of research, I decided that I was going to opt into using an ASIC. But that was only the first step. I now needed to source a device from a reputable supplier, and I needed to put a good amount of money up front in order to make my purchase.
The concept of putting a lot of money into something I’ve never even heard of was a scary prospect, I must admit. I believe in the blockchain, but I wasn’t willing to drop the roughly one thousand dollars I needed to spend to get my feet wet in the world of ASIC mining. So I decided to look into an older generation miner for far less money to give myself an introduction to buying, configuring, and maintaining an ASIC miner.
What I’m about to tell you comes with a heavy disclaimer: do NOT spend more than you’re comfortable losing! The world of cryptocurrency is rife with risks, shady sellers, and sight-unseen purchases. As with any investment into cryptocurrency, one should always do their research, find the best source possible, and be ready to be patient. Buying hardware for mining Bitcoin comes with many, many risks, and one should be as informed as possible. One should also not spend more than they are able to lose. I cannot stress this enough!
With the heavy disclaimer out of the way, let us soldier on.
After weeks of research, peer consultation, and shopping around, I decided to buy my first ASIC miner from eBay. I settled on a Bitmain Antminer S3+ 450 GH/s ASIC device for $200 as my first investment. Sure, its hash rate isn’t great, and it won’t make me amazing amounts of Bitcoin, but I was far more comfortable plunking down $200 on eBay than I was plunking down nearly a grand to prepay for a latest-gen ASIC from a distributor I’d never heard of.

Bitmain Antminer S3+
Miner Has Arrived
Weeks later, after my order was placed and my item arrived, I began the process of configuring my ASIC. It was fairly easy for me to configure, as I am an IT professional by trade. However, user experiences may vary.
I was required to provide a power supply for my ASIC, as it didn’t come with one, and I decided on a Thermaltake 750 watt power supply that I sourced from my local Fry’s Electronics. I also purchased some handy power supply manual switches from a seller on eBay because I didn’t like the idea of running a power supply 24/7 using a paperclip as a jumper.

Power Supply Switch
With ASIC and power supply in-hand, I set about the process of configuration. It was very straightforward – connect the power leads to the miner, connect the network cable, and power the device on. I then had to use an IP scanner to locate the device on my network, as resetting the device to factor defaults reverts the network configuration to DHCP.
I thought I was ready to continue, but a slew of challenges still awaited me.
To Be Continued
As I found out, configuring used mining equipment not such an easy prospect. My challenges were many. Too many, as it turned out, for a single episode. As such, we will pick back up next time. We will continue diving into the world of buying second-hand mining equipment. I will also share the trials and tribulations that come with the territory.
Look to this space for more adventures in Bitcoin!